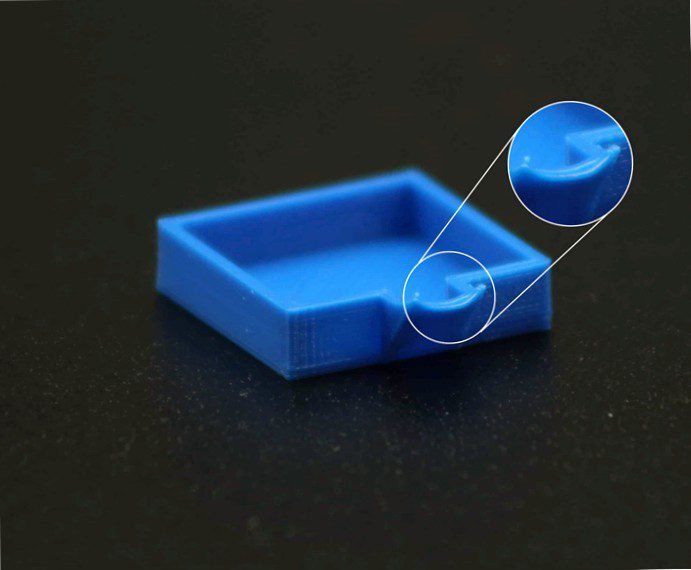
Rough or unclean corners are essentially temperature-related problems. Lack of sufficient time to cool, the corners of the printout begin to curl upward.
Rough or unclean corners (engl. curling or rough corners) on your printed object are mostly due to too high printing temperature or insufficient cooling of your printed object. Depending on the size of the printed object, the problem can also be caused due to too high printing speed.
No matter what the cause of this problem is, by adjusting a few settings in your slicer software, it can usually be fixed very easily.
What are the causes of rough or unclean corners??
Rough or unclean corner is basically another example of error, which is caused by wrong printing temperature or insufficient cooling of the printed object. However, the size of the printed object also plays a not insignificant role. If the printed object is rather small, these effects may well be caused by too high a printing speed.
You can recognize the problem by the fact that the material curls upwards at the corners of your printout. This effect is normally very hard to miss and basically only occurs at the corners of your printout or. very happy to work on corner of an overhang on.
Rough or unclean corners are usually due to the following:
- insufficient cooling of the printed object
- too high printing temperature
- too high a printing speed
How do you avoid rough or messy corners?
Activate cooling of the print object
If there is insufficient or no active cooling of the printed object, the extruded material will take longer to cool down.
To avoid this, enable cooling of the print object if you have not already enabled it. If the cooling is already active but not yet at the upper power limit, then increase the intensity of the cooling.
But be careful, not every material should be cooled down. Cooling must be deactivated for ABS, otherwise material warping will occur. Warping) may occur.
Adjust print temperature
If the print temperature is set too high in your slicer software, the material may be too fluid when it exits the nozzle. The material then very quickly loses the desired shape before it has even dried out.
To fix this problem, make sure you are within the filament manufacturer's specifications with the print temperature you set. If the temperature is set correctly, gradually decrease the printing temperature in your slicer software by 5°C. Check with a test print if the change has achieved the desired effect.
However, be mindful when you reduce the printing temperature. Too low a temperature can lead to under-extrusion.
Correcting the printing speed
The currently printed layer needs a certain amount of time to harden to some extent or. To become at least solid enough that it doesn't immediately lose its shape when the next layer is applied. Therefore, it is especially important for layers under 15 seconds of print time to be printed more slowly.
Any common slicer software offers an option to lower the print speed if the calculated print time of a layer is below a defined value. Enable this option to reduce the print speed for the affected layers when slicing.
In general, if you print slower you will increase the quality of your printout.
Customize the CAD model
If the design allows it, you can try to design a curve instead of a hard edge. This has the advantage of not having to stop the print head completely at the edges to change direction, which in turn can cause the print head to overshoot. Furthermore, it removes stress points from the object and makes the finished printed object more stable. In addition, this measure can sometimes drastically reduce print time for larger print objects.