To be able to write under Linux with C++ applications one needs a compiler and an editor (or an IDE).
On Debian and Linux distributions based on Debian, first run the following statement:
$ sudo apt install build-essential
Under openSUSE – as root – the following instruction is to be used:
$ zypper install -t pattern devel_basis
And under Fedora (33 to 36) the following instruction leads to the goal:
$ sudo dnf -y groupinstall “Development Tools”
This installs all the tools needed for programming. In particular, the GCC compiler (GNU Compiler Collection) is installed. By the way, you can check if it is present on the system with
be checked. More information about the GCC compiler can be found on the homepage of the GCC project.
With the installation of these packages you are ready to go. Because on Linux systems several editors are installed by default, which could be used for programming. So let’s start with an example.
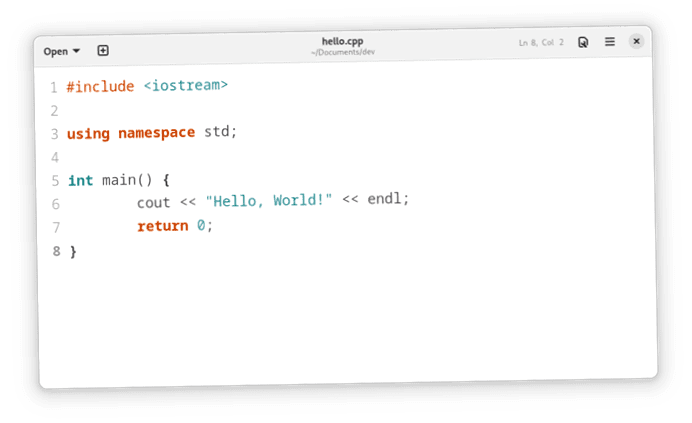
Hello, World!
Open an editor of your choice, for example the “Text Editor” available under Gnome and enter the following code:
#include using namespace std; int main()
Save the file under the name “hello.cpp” from.
To compile C++ code, the GCC compiler is invoked with the g++ command. The complete statement looks like this:
$ g++ -o hello hello.cpp
The option -o causes that an executable file (here: “hello”) is created. The program can now be started with
can be executed. As expected, this leads to the output “Hello, World!”.
Other editors
Simple programs can be written with the “Text Editor”, but more comfortable is a professional editor. The choice is not exactly small under Linux; here is a selection:
- emacs
- vim
- Sublime Text
- Visual Studio Code
On an Ubuntu Linux Visual Studio Code, Sublime Text, emacs and vim can be installed via the package management “Ubuntu Software”. Alternatively, the installation of emacs and vim can also be done via the terminal, for example
$ sudo apt install emacs-gtk
$ sudo apt install vim
Integrated development environment
If you want it even more professional, you can also use an IDE (Integrated Development Environment). Especially Eclipse should be widely used.
Eclipse
This IDE can be installed via “Ubuntu Software. Search for “Eclipse” and then start the installation by clicking on “Install.
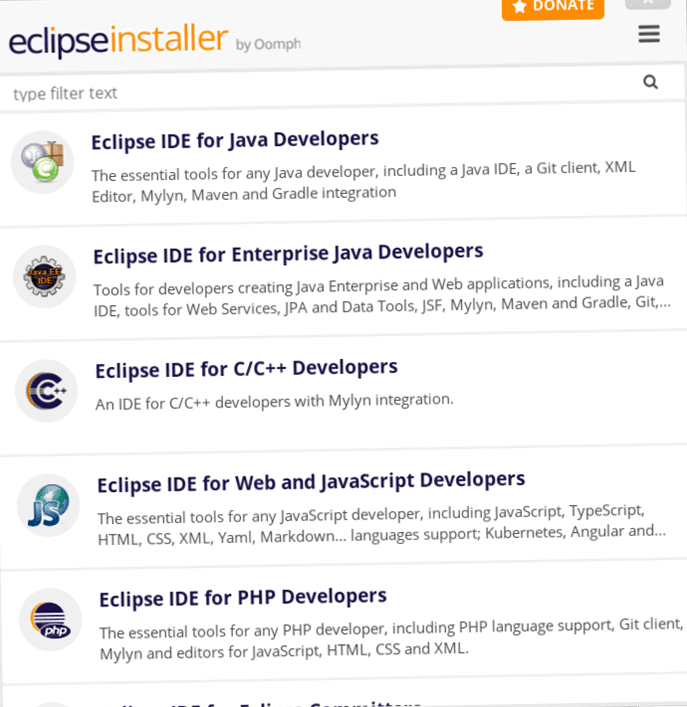
Alternatively, you can find the installation package for Linux on the Eclipse website in the download area under “Eclipse IDE for C/C++ Developers”. In addition, there is also an “Eclipse Installer” that you could use instead. This installer can be started with the command
starts. You will then see the following view, where you have to select “Eclipse IDE for C/C++ Developers.
Whichever way you go, a Java Runtime is required in any case:
$ sudo apt install default-jre
When everything is installed, Eclipse can be started in the terminal. Change to the directory “eclipse” and start the program with
First a workspace must be selected. As soon as this is done, a new C++ project is started by clicking on “Create a new C/C++ project.
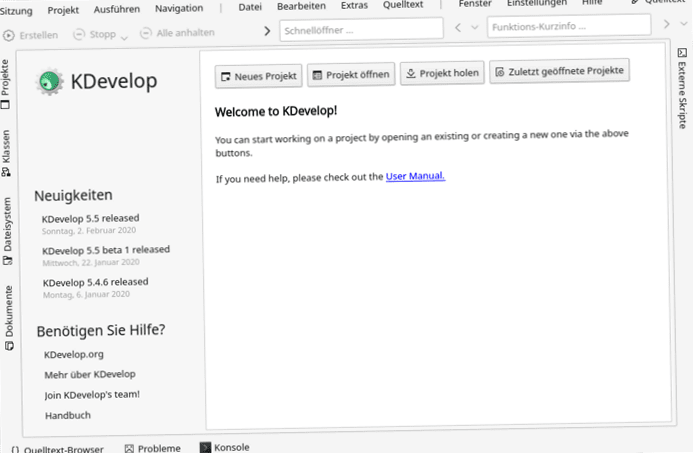
kDevelop
KDE users may prefer to use the development environment kDevelop. It can be installed via the software management Discover. After starting this IDE a new project is started by clicking on “New project started”.
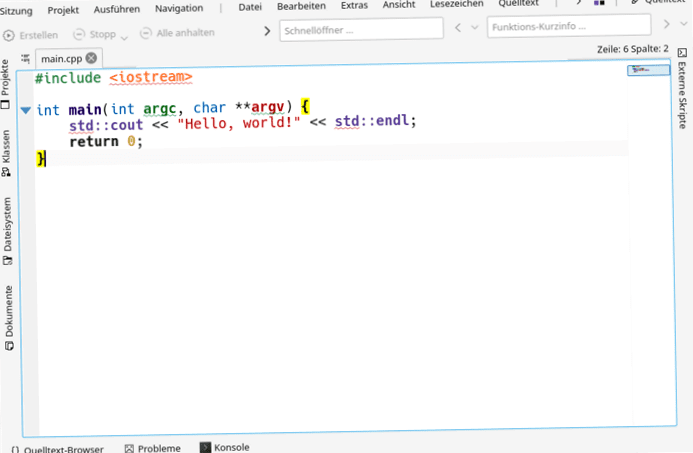
A console application could then be started by selecting
> Standard> terminal> CMake C++
can be started. In the opening editor you will see a Hello Word code sample.
JetBrains CLion
Finally, I would also like to mention a commercial product. And that is the cross-platform IDE CLion from JetBrains. Especially developers who are used to other JetBrains products will quickly get used to CLion. Fortunately, there is the possibility to download a 30-day trial version.
Ubuntu users also have the possibility to download CLion as a snap package. In the terminal this is done with the following statement:
$ sudo snap install clion –classic