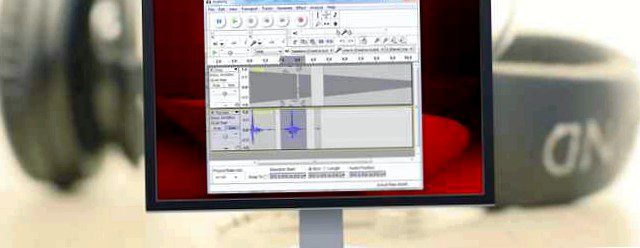
Audacity is a free audio editor that lets you edit interviews, voiceovers, music and other sound files. Wouldn't you like to just do simple cutting work? Then listen! If you only know a few Audacity tips, this can make audio editing a lot easier.
Not sure if you need Audacity? Here are 10 ways you can use it to put Audacity to 10 creative uses you probably hadn't thought of. 10 creative uses for Audacity you probably hadn't thought of. Many people use Audacity for podcasts or mixing music, but that's not all it's good for Read more, which covers everything from podcasting and ringtones to practicing foreign languages and improving your reading skills.

Manually record “what you hear”
Have you ever wanted to record audio from your computer? If so, you probably tried to connect a microphone to the speakers. You were probably quite disappointed with the results when you did this. Fortunately, there is an easier and better way.
You will need the following:
- 5mm male-to-male stereo audio cable
- 5 mm audio splitter cable (optional)
- 5 mm headphones or earphones (optional)
Here's what you do:
- Plug the stereo audio cable into the audio out port of your computer. This is where you normally plug in your headphones. It's usually color-coded green and indicated by a headphone icon.
- Plug the other end of the stereo audio cable into the line-in port of your computer. It is usually color coded as blue.
Optional: With this setup, you can't really hear the sound anymore. To fix this, plug the one audio splitter into the audio output (green) and plug the one stereo audio cable into one of the audio splitter's connectors. Then plug your headphones into the other port on the audio splitter.
Now you should be able to use Audacity to record the sound you hear.
Remove background noise
We've covered this tip a few times, but it's so useful that it bears repeating. If your mic recordings tend to “buzz” or if they have a lot of “background static”, Then this simple procedure will help you get rid of it.
- Mark a section of the recording where no intentional sounds were made.
- Select Effect> Noise removal in the menu options.
- Click Get Noise Profile.
- Now mark the entire recording from beginning to end.
- Select Effect> Noise removal again in the menu options.
- Click OK.

Amplify vs. Normalize
If you have an audio file that is too quiet or too loud, or a mixture of both, this tip can be helpful. In fact, it can come in extremely handy when you're recording interviews. 3 Audacity tips to improve your recorded interviews 3 Audacity tips to improve your recorded interviews Continue reading. First, you have to decide:
- Is the entire track too quiet or too loud? Then amplify.
- If only certain aspects of the track are too quiet or too loud? Then Normalize.
Both options can be found under Effect Menu. To use them, all you have to do is select a portion of the track (or the entire track, if desired) and apply the effect from the menu.
For more information, see the Audacity manual page.
Cut Silence
This is a common problem for people working with voice recordings: frequent gaps of silence. The immediate solution is to manually highlight each gap and press the delete key. This works well if your shots are short (less than a minute)..
But if you are doing this for a 2 hour recording, this is a lot of unnecessary work. So you can reduce all this work one mouse click:
- Mark the entire recording.
- Select Effect> Cut silence from the menu.
- Min. Duration, Max. Duration, and Silence Threshold are used by Audacity to determine which parts of the recording count as “silence”.
- Silence compression determines how much of the silence is removed. Instead of removing all silence, Audacity simply compresses it. Example: 4: 1 compression would compress a silence from 4 seconds down to 1 second.
- Click OK.
For more information, see the Audacity manual page.
Creating sound effects
If you're trying to create sound effects but don't have samples to work with, have Audacity provide you with the samples. Generating The menu has several options to help you get started. The explanation of each option would be worthy of its own article. For more information on using each option, see the Audacity Manual page.
Of course, these sounds are probably not useful on their own. Combine the created sounds with some of the effects in the Effect You will be surprised what results you can achieve.
Rip audio from video
Copying the audio from a video file is simple and straightforward. The only requirement is that you install FFmpeg for Audacity and LAME for Audacity, both of which you can download here. Scroll down and install the right versions for you (only available for Windows and Mac).
Once it's installed:
- Open the video file in Audacity using File> Open.
- Choose File> Export.
- Choose MP3 as the export file format.
- Click save and you're done.

Start with good source material
This last tip is more of a general tip: if you want audio editing to be a breeze, Always start with a good audio source. Whether you use Audacity or a professional solution that costs thousands of dollars, you can only clean up an audio file so much. The same is not true for video, which can be considered manipulated and passed off as “good enough” – None of the same tricks work with audio.
Instead of fixing a poorly recorded file, change your setup to create clean recordings. You'll thank yourself down the road. There's a lot to say about this, but there are some good starter tips for recording music at home with Audacity in this post A beginner's guide to producing home music recordings with Audacity A beginner's guide to producing home musicwith Audacity For many musicians, the cost of a professional recording engineer is too high. It is better to become familiar with music production and recording techniques and use tools on your computer to record your own music. Read more .