The record is digitized and burned on CD. Great thing, but somehow the CD without cover lacks the necessary flair. But how to get the big picture on the record cover onto the CD? Or even into the MP3 file?
Solution 1: Scan record covers
Does anyone else know scanner? The things were once totally hip, honestly. Work in principle like a copier, only without printer at it.
Ok, seriously. For old photos, slides or other products that are only analog and on paper, scanners are the first choice to convert them into digital formats. In the first decade of the new millennium, there was a lot of need for this; today, of course, scanners are still available, but they are far from a technical sensation.
The well-known flatbed scanner has got competition by devices specialized on certain areas like photo or slide scanners, which fulfill only the one purpose, but this just sufficiently and with clearly less space requirement. Now a record cover can be pushed however only with difficulty by a photo scanner, in order to scan thus a record cover already a flat bed scanner for DIN A4 is needed.
Scanner too small or record cover too big?
When placing the record cover on the scanner, it quickly becomes clear: this will not work at first attempt. The record cover is simply too large or. the scanner is too small. Only the piecemeal method helps here. First scan one half of the cover, then the other and finally put both parts together again in the image processing.
A relatively large effort, but even an A3 scanner does not make the work easier, because the cover of the record does not fit completely on the scannable area. They really didn’t think about the future during the planning 😉
Solution 2: Record cover photograph
If you don’t have a scanner and don’t want to scan thousands and thousands of records, you won’t want to buy one extra. Photographing is always a cheaper alternative, but requires some experimentation until the ideal solution is found.
In order to photograph a record cover ideally, it is necessary to position the camera directly above it at a 90-degree angle if possible. Even a slight deviation will result in skewed edges. In unfavorable light conditions you will cast a shadow on the cover or even be reflected in it.
But good light is important, because good results can only be achieved without flash. With flash there are only unsightly reflections on the cover and thus also on the picture.
Find different, well-lit locations and take test shots. When the sun shines go outside. And ignore the glances of the neighbors and their whispering.
Solution 3: Download album covers from the Internet
With an appropriate search in the search engine of your choice, you will find several sites on the net that offer covers of LPs, CDs and DVDs to download.
Here, however, caution is required, because the images are of course subject to copyright and may be used in the rarest cases. At least in the private sector, however, there is little danger of being overwhelmed with consequences. In the commercial or. commercial area already rather.
Sites with free and high-quality content also have a stigma attached to them. Viruses, Trojaner and Abzockfallen hide themselves gladly behind apparently free and mad offers. Of course, this does not have to be, but pay close attention to what happens on these sites and whether any dubious browser windows open in the background.
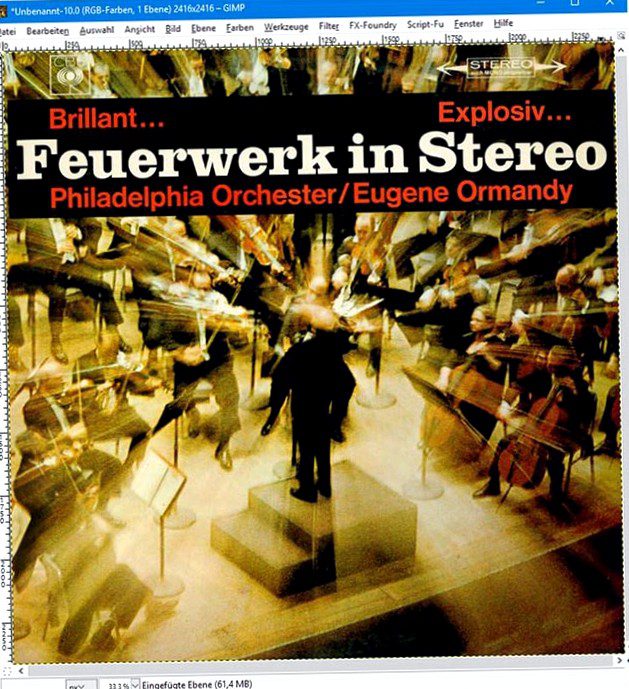
Editing scanned album covers with Gimp
Whether scanned or photographed, the images created need to be stitched or cropped afterwards. For these simple tasks you don’t need a tutorial or a professional program like Photoshop. Free graphic programs are also well suited for this and there are several of them. Our tip is Gimp. Gimp is free and available for all systems. The user interface takes some getting used to, but is quickly understood.
First you have to download and install Gimp of course. The download is available here.
Once the installation is done, start Gimp. If you have scanned your record covers open both files with Gimp, if you have photographed the cover you only need the one file. The following description assumes a scanned cover. From the two images we now create a single image again with Gimp.

Create selection, copy and paste
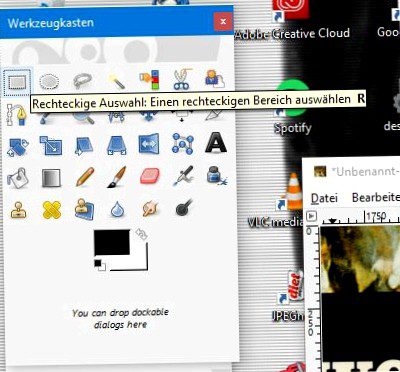
The two scanned images also contain the edge of the record cover. This one is usually not in perfect condition. Select the Selection tool in the toolbox and select an area of the plate cover that just leaves out the edges of the cover. When the selection frame fits, release the mouse button.
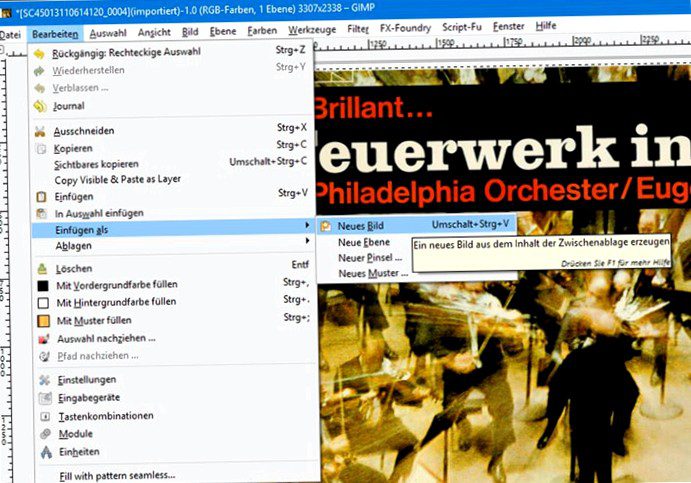
Now select Edit> Copy to copy the selected area to the clipboard. Then select Edit> Paste> Paste as new image. The copied area is now created as a new file.
Now look at the upper frame (title bar) of the window with the new file. There you will find the size of the image in pixels behind the filename. The first value specifies the width, the second the height. Remember the width specification and close the window. Save is not necessary.
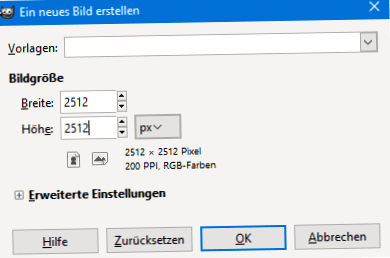
Choose File> New. In the following dialog box set both values (width and height) to the value you just remembered. Click OK, and you will see a square image with a white background.
Now select Edit> Paste as> Paste as new layer. The section you copied earlier will now be pasted as a new layer. You can see this in the Layers palette, where you can now see our pasted image next to the background.
Now switch to the second scanned image and select the selection tool again. Theoretically you could now copy the whole image, but a little more than the missing part of the plate cover is enough. So select something more than the missing part, copy it and add it as a new layer to our existing file.
Now there are two layers in the image, which you can move back and forth. For this you have to select the layer you want to move by mouse click in the layers palette.
Rough sliding actions can be done by mouse, but if you want to position the two sections exactly, you can use the arrow keys on the keyboard. This is a little more precise.
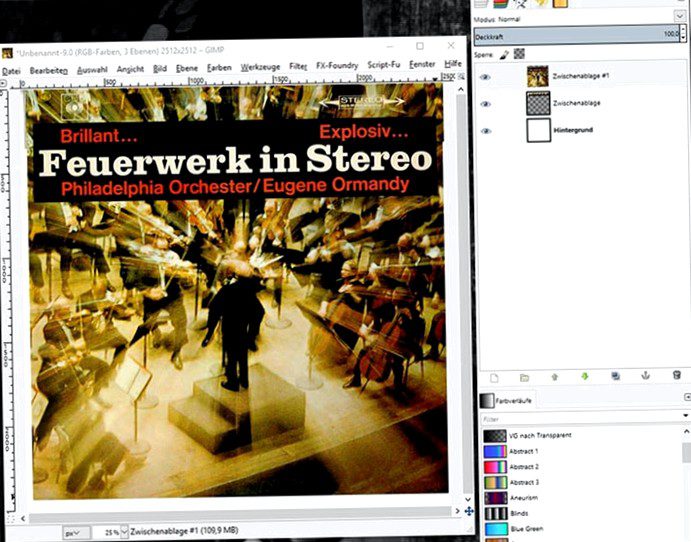
Once you have positioned both layers correctly, your disk cover should no longer have a visible interface and should largely fit together perfectly. Right click on a layer in the layer palette and choose “Merge all visible layers”. This is how you create an image from the three layers.
Now select the Selection tool again and drag a square frame from the upper left corner of your disk cover to the lower right corner. Not so easy, but this is easier. Just press the Shift key while dragging, Gimp will automatically drag the frame proportionally to each other, so square up.
Once you have drawn the frame and got your album cover well, copy the selected area again and paste it back into a new image.
Voila – you can now save this file as your record cover and continue using it. Depending on the resolution used when scanning, you should still reduce the size of the image significantly for use in MP3 files.